
"Help Ukyo! It looks ugly! Please fix it for me!" Ok, I'm not going to do it for you, you're going to have to do it yourself. First, what are nubs anyways?

I bet you can guess what Nubs are. These are the ugly extra plastic left from the Sprues that we cut from. So how do we get rid of them? Well, this will be a step by step process that requires you have patience. Lots and LOTS of patience. But I assure you, results are going to be magnificent :)
So Step 1, we need to trim down the long nub. You can use your Side Cutters for this but I prefer using the Hobby Knife for a cleaner result. Just be careful, Hobby Knives are very sharp! "So how do I cut it? Do I cut it straight away?" Here's how I trim down the nubs.

You don't need to follow the number of cuts, but you get the idea. We want to trim it as short as possible but we don't want to cut it all the way. That's a job for another tool. Here's how I trim it down using a hobby knife.


Ok, not bad. But it still looks ugly. What we have now is what we call a stress mark. Stress marks are basically the white areas that are left after we cut the nub. Don't worry though, if you followed my previous instructions on trimming, you'll have stress marks on the nub but not on the Part itself which is a good thing. Next, we're going to get rid of that pesky stress mark.

Gently hold the Metal File and place your thumb above it. This would make your hands stable while handling the Metal File. Only put a very small amount of pressure on the Metal File, just enough that it's sanding down on the nub. Put too much and you might end up sanding the part itself and leave an uneven surface. When sanding, you need to do single, long strokes while making sure to check after every stroke. If you do plenty of short strokes, you'll pretty much end up ruining the Part.

See? No more stress mark! But wait.. Now there's a rough surface! No need to fear, we just need to smooth it out now.


Now we're getting somewhere! Don't worry, that's just dirt from when we sanded it. We just need to clean it now.
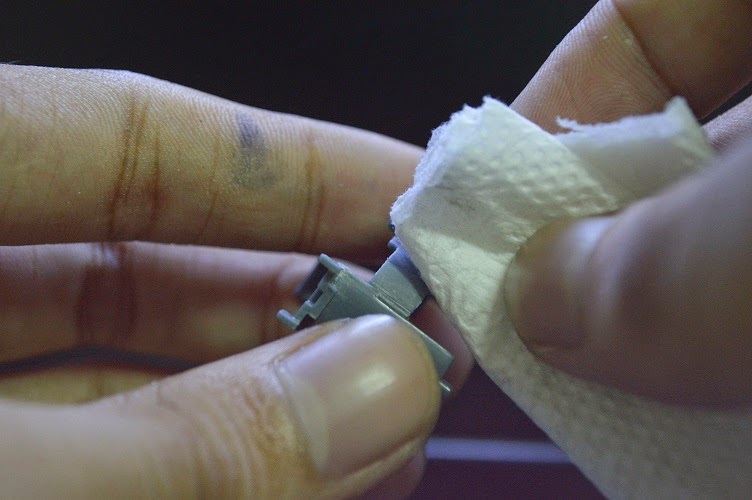
Take a piece of clean cloth (or tissue like I used here) and clean the Part where we sanded it.

And there you go! Nice, clean, and no signs of any nub marks or stress marks! Just keep doing this now for all the nubs you see and you're good to go. You just simply follow the instructions now on how to build your Gunpla and you'll be fine.
PRO TIP:
Wondering if this'll work for all the Parts? It looks like it works on the grey inner frame, but what about the colored parts as well as the clear parts? Well, as far as I know and through my experiences using this technique, it works for all the parts except for chrome plated parts though. Besides that, you're all good :)
Wondering if this'll work for all the Parts? It looks like it works on the grey inner frame, but what about the colored parts as well as the clear parts? Well, as far as I know and through my experiences using this technique, it works for all the parts except for chrome plated parts though. Besides that, you're all good :)
If you plan on painting your kit, please proceed to the next tutorial before starting/continuing with your snap build
No comments:
Post a Comment